Before starting the recording, talk to the participant through the Intercom, and establish IR Camera contact. Explain to the participant how long each condition will run for. Verify that the participant is comfortable and ready to begin recording. Ask the participant to keep as still as possible and to remain still until they hear the operator’s voice again at the end of each run.
- To start recording, click on “Start Initialization” on the “Acquisition Setup” window.
- When prompted, ask the participant to keep as still as possible and to remain still until they hear the operator’s voice again at the end of each run.
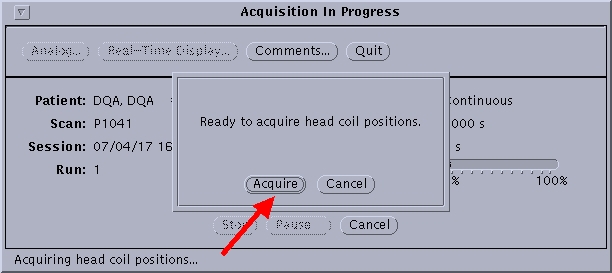
- Then click on “Acquire” head coil positions in the dialog shown in Figure 8.1.
- You should see the Coil Acquisition screen on the Real Time display
- The Coil Calculation window with the coil errors will appear on the megmap screen. If the error is under the thresholds level, continue.
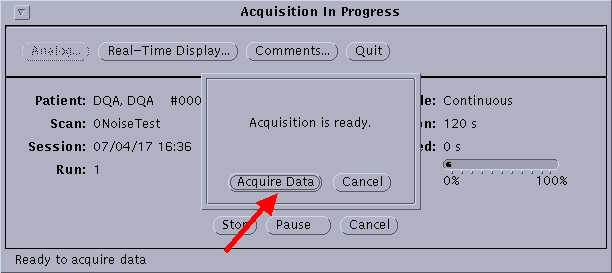
- Select “Acquire Data” and wait until you see the signal from the MEG channels on the real time display.
- Inform the experimenter to start stimulus delivery.
If the scan has been set up in epoch mode, recording will stop automatically.
If the scan has been set up in continuous mode, you will need to do the following to finish the scan:
- When the experimenter informs you that their stimulus presentation has finished, click on “Stop” in the “Acquisition in Progress” window.
![[Caution]](images/html-admon/caution.jpg)
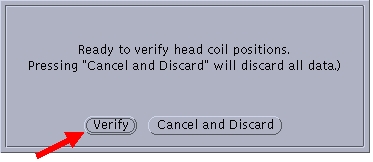
Caution Do not click on Cancel at this point. Cancel should only be used when you want to discard the data. - When prompted, Click on “Verify” head coil positions. The maximum discrepancy between the initial values obtained with the localised coils and head shape should be less than 0.8 cm (LPA and RPA tend to move the most between digitisation and recording).
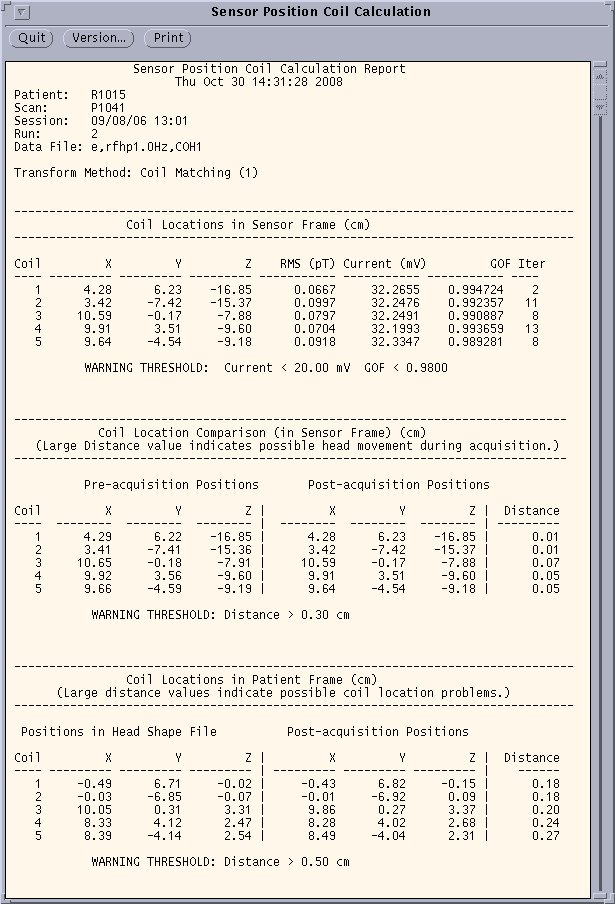
- The last coil Calculation will appear on screen. You can verify how much movement there is by checking the error shown in the Sensor frame calculations, as shown in Figure 8.4.