- Enter the MSR.
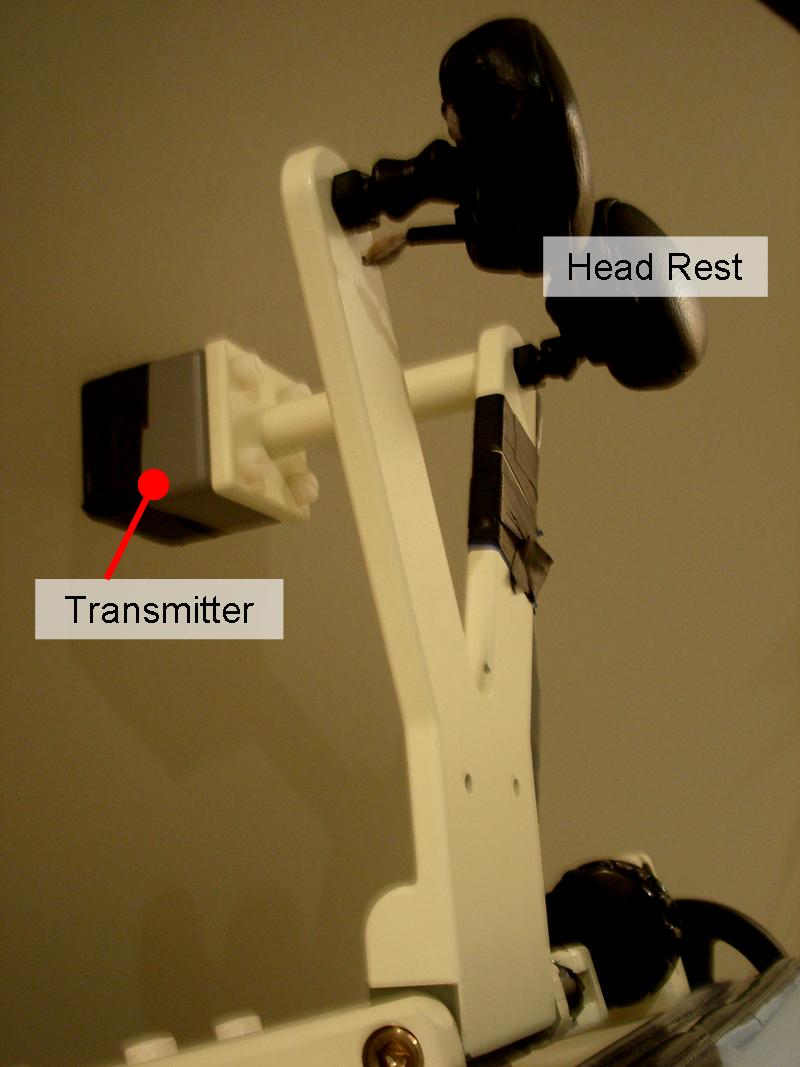
- Attach the Polhemus head rest to the back of the chair, see Figure 7.5.
- Ask the participant to sit in the chair / lay on the bed. Adjust the chair to make the participant as comfortable as possible e.g. raise the back of the bed to give the participant’s neck more support.
- Clean the participant’s forehead and area in front of the ears using an alcohol-free wipe.
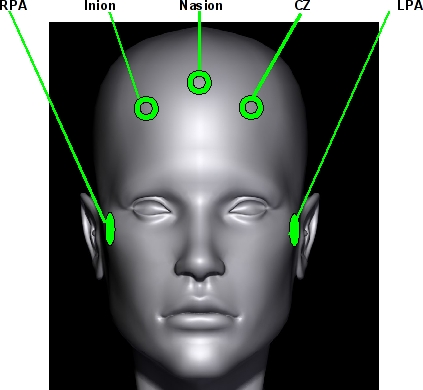
The fiducial points or head coil placements are used for head localization (the process of locating the participant’s head in space relative to the magnetometers). They are later used to co-register the MRI Coordinate System with the MEG Head Coordinate System.
- Ensure each coil’s label and colour corresponds to the correct port on the coil panel.
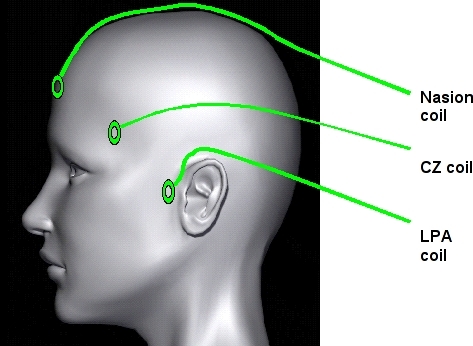
- Cut 5 short strips of tape (approximate length 4 cm each). Use these strips to attach the labelled coils to the correct positions on the participant’s head (see Figure 7.6 and Figure 7.7 for help). The leads from the coils should be draped towards the back of the participant’s head (see Figure 7.7).
- Place Head Coil 1 (LPA) at the left and Head Coil 2 (RPA) at the right preauricular points (indentation just above the tragus), or on a section of hard cheekbone nearby on each respective side of the head.
- Place Head Coil 3 (Nasion) above (3-4 centimetres) the nasion (indentation between the forehead and the nose) midline.
- Place Head Coil 4 (Cz) 3-4 centimetres on the left of Coil 3.
- Place Head Coil 5 (Inion) 3-4 centimetres on the right of Coil 3.
- Use a small section of tape, with a cross on it, to draw a reference point on the bridge of the nose.
N.B. The coil placements in steps 4, 5 and 6 should not be in a straight-line. Depending on the participant's respective hairline and scalp topology, coils 3, 4 and 5 should be in the shape of either a triangle, or an inverted triangle.