The Patient selection window is shown in Figure 7.2. In this window, the following procedure must be performed:
- Ensure that no participant is currently selected using right mouse click in the list of participants and choosing “Deselect All Patients” from the drop-down menu.
- Click on “New Patient”.
- In the dialog shown in Figure 7.1 Enter participant ID (beginning “Rnnnn”) and scan name (“Pnnnn”), if the scan has already been set up.
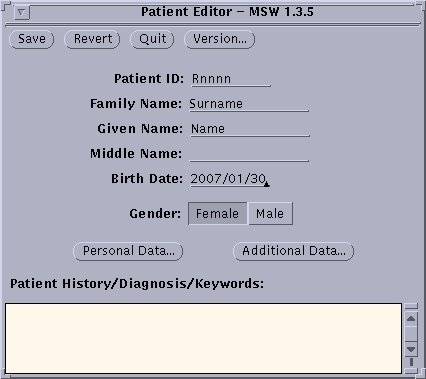
- Enter participant's personal details; name and date of birth (in the format yyyy/mm/dd).
- Click on “Save”.
- Once a new patient has been added, they will appear in the list on the left side of the window.
- Choose the correct participant by clicking on the corresponding box on the left-hand side of the name. A tick will appear in the box.
- Click on “Post Selection.”
- To ensure your participant is selected click on “Show Posted Selection”. The participant name should appear in a new window at the bottom of the screen.

- Click on “Acquisition Setup”.
- Load a previously specified template: Click on “Scan” and select the scan template form the drop down menu.
- Check that the selected scan is the appropriate one.
- Rule out the presence of any artefacts: Click “Send As Idle Parameters” and the selected scanner read out will be displayed on the display monitor.